A new and improved way to measure residual stress.

μ-X360J Portable X-ray Residual Stress Analyzer

μ-X360J Portable X-ray Residual Stress Analyzer

Features

μ-X360J Portable X-ray Residual Stress Analyzer
green circles
  • Accurate The μ-X360J uses a 2D detector to detect a single incident X-ray exposure, allowing you to capture the full Debye-Scherrer ring for more precise residual stress and retained austenite measurements.
  • Easy to Use Our X-ray analyzer features an LCD monitor that ensures you can easily see and adjust your sample. Anyone can use it with some basic training.
  • Fast Measurement Speed When measuring ferritic steel samples, residual stress results are displayed in just under 40 seconds, an improvement from our previous model, the μ-X360s.
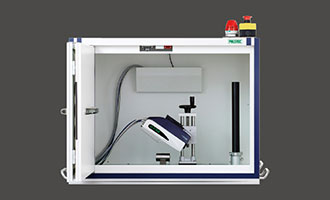
  • Low X-ray Power The μ-X360J provides excellent stress data while keeping the X-ray power low to ensure operator safety. This analyzer also comes with an optional safety cabinet with interlock to prevent X-ray leakage.
  • Non-destructive X-ray diffraction is a non-destructive method that allows you to accurately measure residual stress or retained austenite without cutting or damaging the original sample.
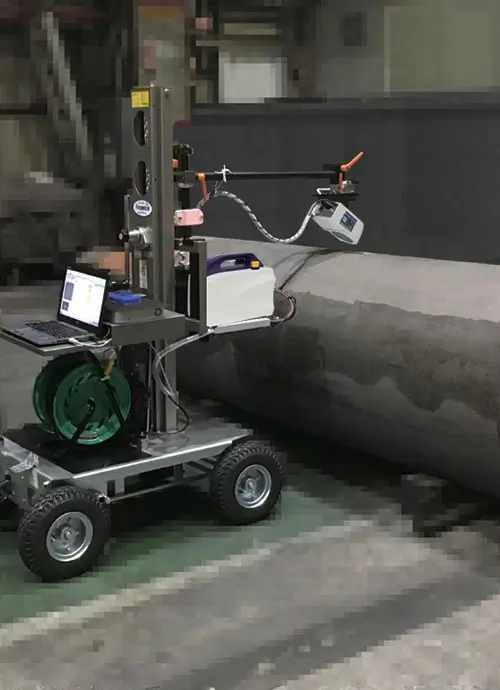
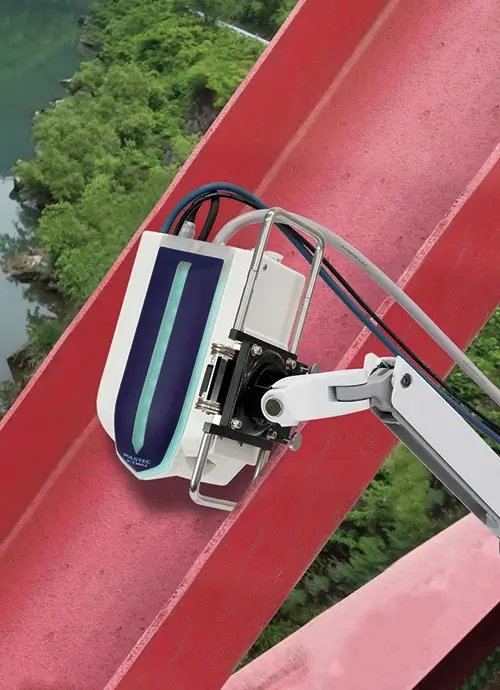
  • On-site Capability On-site measurements are possible with the μ-X360J. This unit comes with a tripod and arm that enables flexible positioning, making it possible to achieve an increase in overall work productivity and lower operational costs.
  • Portable Whether you’re checking residual stress in a rolled component or analyzing annealing effects of welds in oil tanks, you can do with the μ-X360J. It’s lightweight, easy to move, and can be used anywhere.
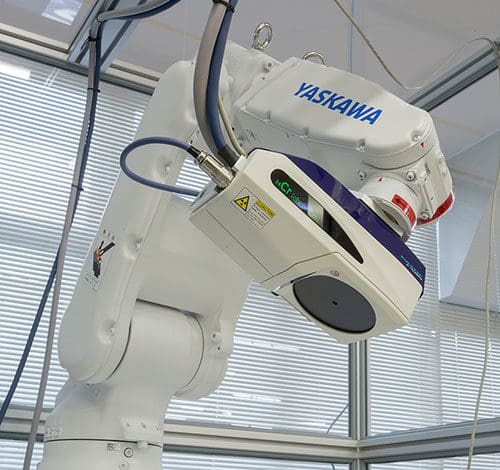
  • Optional Capabilities Pulstec offers many optional accessories that extend the μ-X360J’s capabilities, including a robot arm for tri-axial oscillation and an electrochemical polisher for depth profile measurements.

Benefits

Residual stress and retained austenite measurement is now easier! With the cosα equipment, work that used to take a long time becomes faster, and because of its simple usage, it can be used not only in R&D but also in Quality Control departments. It can also be used for on-site measurement using a tripod, and for automatic measurement systems using robots and 3D scanner.

We offer free sample testing. First five spots for free.
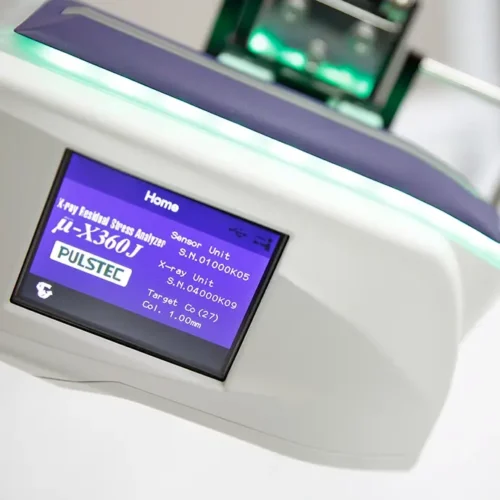
μ-X360J Portable X-ray Residual Stress Analyzer
green circles

Request a sample measurement

Specifications

μ-X360J Portable X-ray Residual Stress Analyzer
green circles
  • Measurement Items
    • Residual Stress (Included with Software)
    • FWHM (Included with Software)
    • Retained Austenite (Optional, Added Software Function Required)
  • X-ray Tube & Output
    • Air cooling
    • Cr, V, Mo, Cu or Co replaceable
    • 30kV, 1.5mA maximum
  • Measurement Method
    • Single incident angle X-ray cos𝛼 method
  • Power Supply
    • AC100 to 240V, 50/60Hz, 130W
  • Collimator Size
    • φ1mm (Spot size at sample surface is approx. 2mm)
  • Size(mm) & Weight(kg)
    • Sensor unit: 142W x 216H x 115D; 3.0kg
    • Power supply unit: 295W x 234H x 169D; 5.1kg

Applications

  • Residual stress measurement on gears, springs, bearings, crankshafts, camshafts, connecting rods, transmissions, Body in White, wheels, suspension shafts, and suspension arms
  • Residual stress measurement on AM samples
  • Analyzing annealing effects of welds.
  • Field measurements (such as bridge maintenance)
  • In-situ measurements
  • Grinding burn evaluation
  • Case depth hardness evaluation
  • Retained austenite measurements on heat-treated samples (Optional)
  • Depth profile measurement on shotpeening samples (Optional)
  • Stress mapping by XY stage or Robot (Optional)
  • Residual stress measurement on large grain samples such as Electric steel (Optional)
μ-X360J Portable X-ray Residual Stress Analyzer
green circles

Accessories

View All Accessories

X-ray safety cabinet

X-ray Safety Cabinet

The safety cabinet with interlock is designed to protect users from X-ray exposure. The leakage is less than 0.01 mRem/hour.
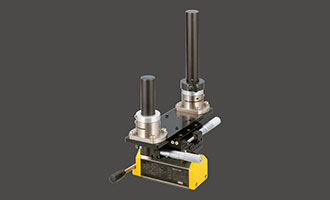
Flexible arm with magnetic stand

Flexible Arm With Magnet Stand

The arm is fixed to the specimen with the magnetic stand and can be adjusted finely by 50 mm in both X and Y axes with a micrometer.
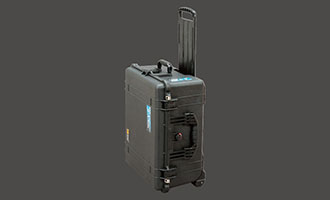
Hand-carry case

Hand-Carry Case

Taking your equipment on the go can be a breeze. Our stress analyzer can be packed in a hand-carry case that makes traveling easier.
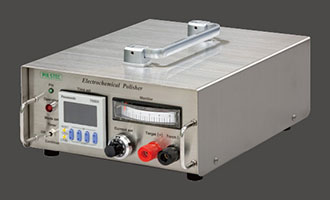
Electrochemical polisher

Electrochemical Polisher

This is used when you want to measure the internal stress of a sample. It can be used to remove the surface without adding new stress.
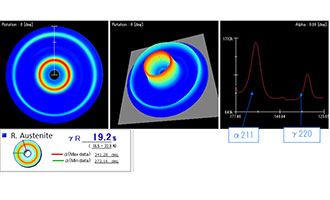
Retained austenite

Retained Austenite Software Option

With this added software function, the two-dimensional detector can take the full ring of both martensite and austenite diffraction, and calculate the percentage of austenite which was not transformed to martensite upon quenching.
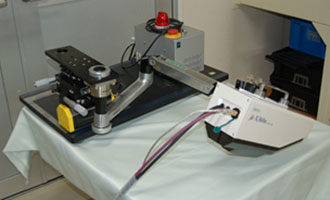
Mapping function

Color Mapping Function

With this software option, the measurement results obtained using the motorized XY stage can be displayed as color mapping.
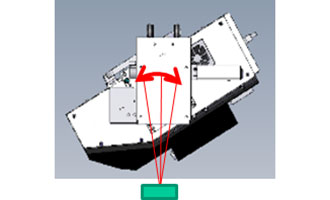
Oscillation unit

Oscillation Unit

By oscillating the angle of the X-ray, diffraction from more numbers of crystal planes are obtained.
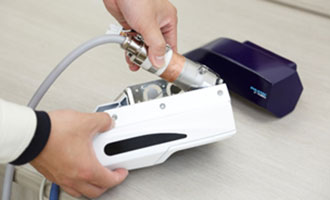
X-Ray Tube Exchange

X-ray Tube Exchange

The X-ray tube can be replaced by the user. Cr, V, Cu, Co, Mn tube is available.

Resources

Technical Documents
Technical Documents
Residual Stress AnalyzerRobotic Residual Stress System
Residual stress reference specimen[pdf]

Learn More
Technical Documents
Residual Stress AnalyzerRobotic Residual Stress System
Collimator for replacement[pdf]

Collimator for replacement

Learn More
Technical Documents
Residual Stress AnalyzerRobotic Residual Stress System
X-ray tubes for replacement[pdf]

X-ray tubes for replacement

Learn More
Technical Documents
Residual Stress AnalyzerRobotic Residual Stress System
Robotic Residual Stress Mapping System With 3D Scanner Brochure[pdf]

Brochure for the Robotic Residual Stress Measuring System With 3D Scanner

Learn More
Technical Documents
Residual Stress Analyzer
μ-X360J Accessory List[pdf]

Optional items for the micro-X360s.

Learn More

Related Posts

XRD Residual Stress Analyzer robot arm

Strain Gauges Versus XRD Analyzers

How do strain gauges and XRD analyzers compare when it comes to measuring residual stress? Learn more about the...
Read More
Pulstec's XRD analyzer is being used to perform on-site residual stress measurements

How to Perform On-Site Residual Stress Measurements

This step-by-step guide highlights how to use Pulstec's μ-X360s XRD analyzer to perform field residual stress measurements.
Read More
Four reference specimens for Pulstec's residual stress XRD analyzer

Calibration Standards & Reference Specimens for Residual Stress & Retained Austenite Measurements

In this technical guide, you'll learn about calibration standard and test specimen requirements for retained austenite and residual stress...
Read More

Speak with an Equipment Testing Expert

We know our technology is leading the industry. Allow us to show you the benefits of working with Pulstec. Contact us today for a free demonstration on-line or at your facility.